
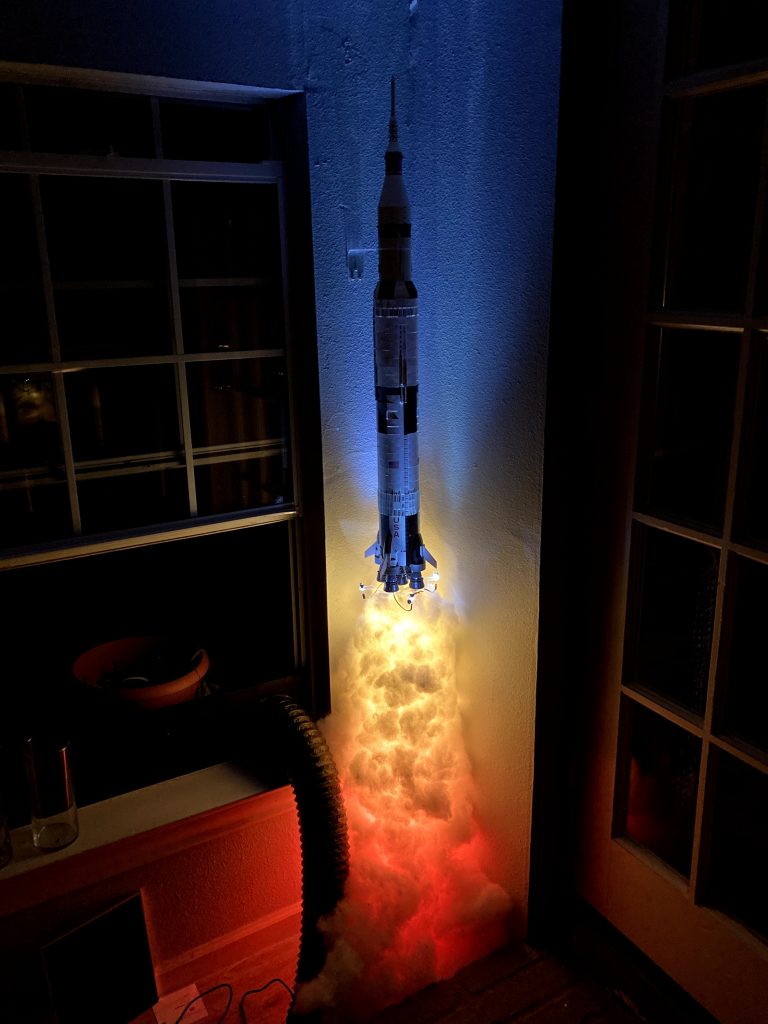
For Christmas 2019, my son gave me an extraordinarily gracious gift: the brilliant LEGO Saturn V Rocket kit. The gift arrived with a single condition: that we assemble it together, which we did gleefully a few days after Christmas. Ever since putting it together and setting it proudly in my office, I’ve thought that I’d like to create a display to show it off to even better advantage. This week, I finally finished the project!
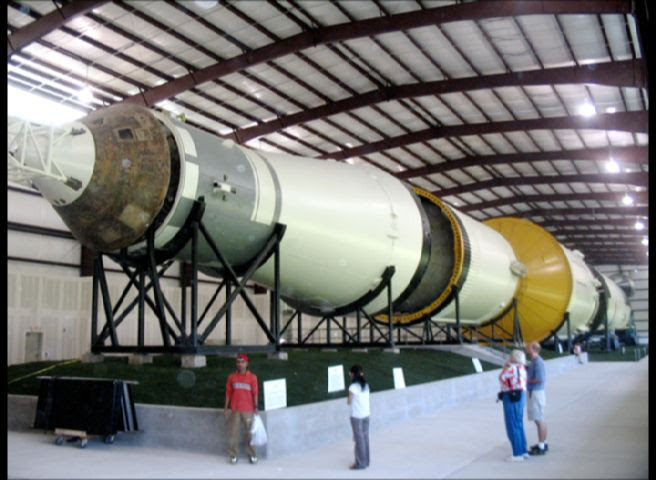
This was one of the more ambitious maker builds I’ve taken on, combining programming, audio editing, electronics, CNC milling, and electronics. I was heavily inspired by similar projects that others have done., especially that of Ase Miller, whose code I used as a starting point for the visual effects. (Thanks, Ase!) I was also inspired by the Saturn V itself, which is one of the most awe-inspiring artifacts I’ve ever seen. Here’s a photo of me and my mom ogling one of these behemoths on a visit to Space Center Houston:
Parts List
All of the electronics parts are available through Adafruit; the rest can, of course, be had at Amazon. You can find the same or equivalents elsewhere too, but I appreciate all the supporting info that Adafruit provides.
- Arduino UNO: I thought about something fancier, but this fit the bill nicely. If I decide to add HomeKit/Alexa support in the future, I could swap in an Arduino that supports wifi. And more memory would’t be a bad thing, as I bumped into the UNO’s limits and had to rework a portion of the code to fit in memory.
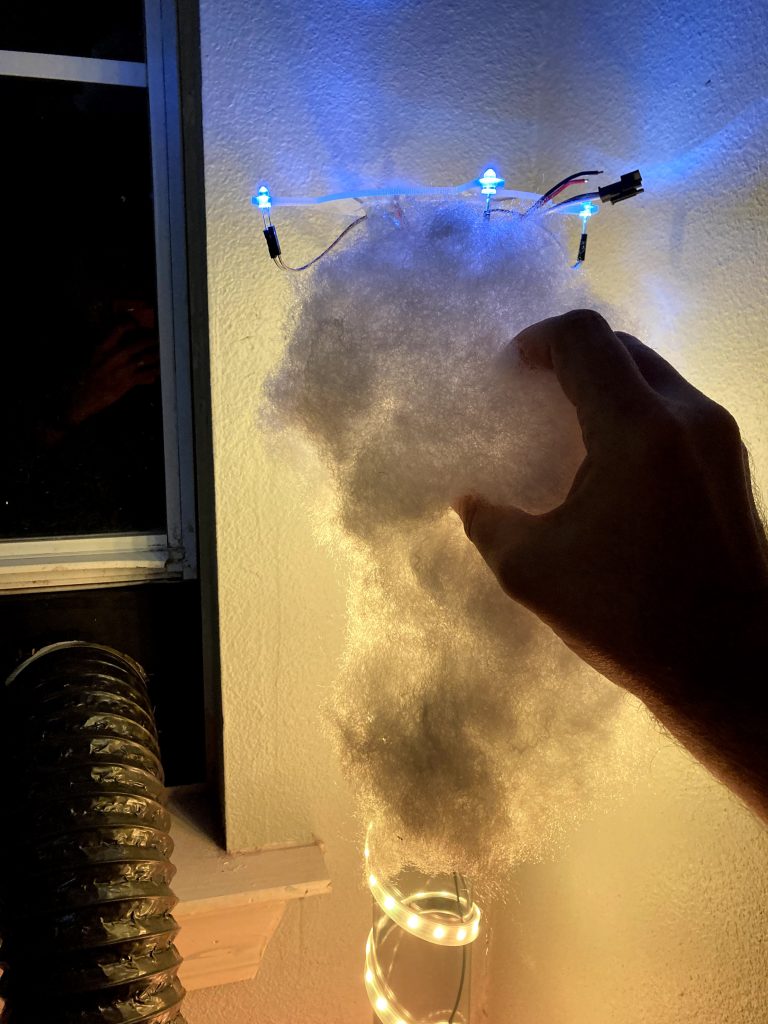
- Adafruit NeoPixel Digital RGB LED Strip – White 60 LED 2m – WHITE: Neopixel strips are the handiest way I know of to coordinate a bunch of LEDs.
- 5V 10A switching power supply: Powering things via USB didn’t provide quite enough juice to drive everything at once, which would cause the sound to abruptly stop failing at random moments. The 10A supply handles everything with plenty of headroom.
- Female DC Power adapter – 2.1mm jack to screw terminal block: This made wiring the power supply to the other electronics easier.
- Adafruit Audio FX Sound Board + 2x2W Amp – WAV/OGG Trigger – 2MB: This handy little module has both memory and an amp onboard, making it really easy to play sounds. It can also be controlled with pushbuttons or over a serial connection, which provides a little more control over playback.
- Speaker – 3″ Diameter – 4 Ohm 3 Watt: Combined with the sound board, this creates a decently loud sound. (An obvious upgrade would be to add a subwoofer to make the rocket rumble even beefier.)
- Adafruit Perma-Proto Half-sized Breadboard PCB: Handy for connecting everything up easily. I almost decided that it was time to learn to make custom PCBs for this project, but my laziness eventually beat out my OCD.
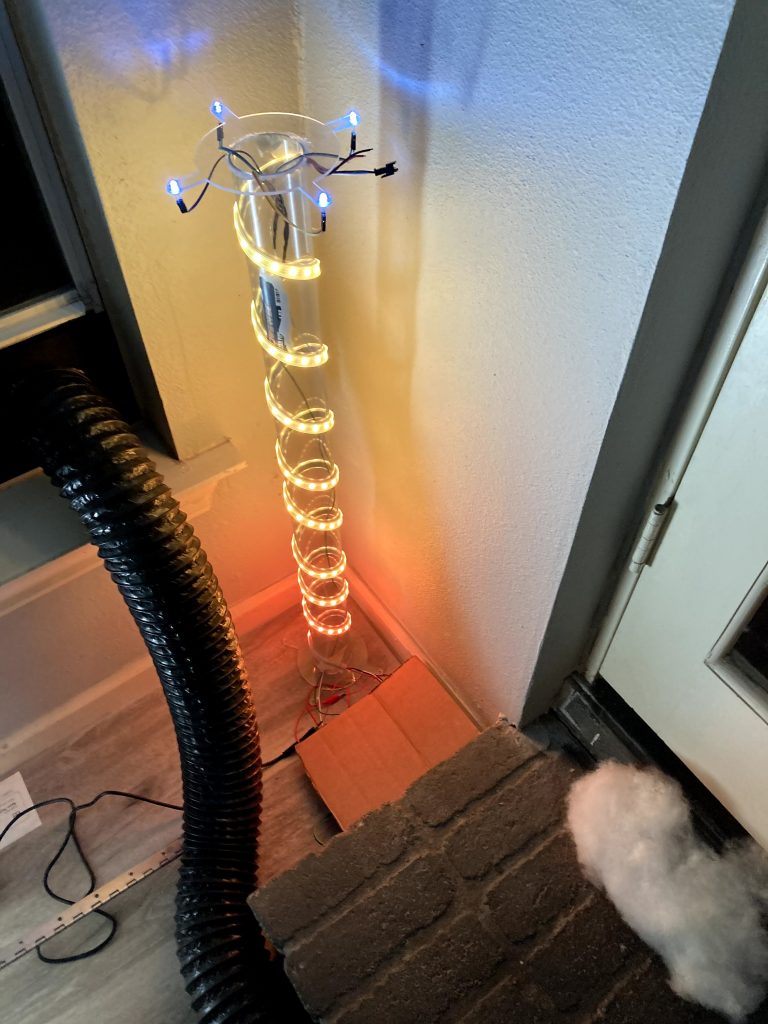
- Clear Polycarbonate Tubing, 4′ Length: Makes up the vertical component of the stand around which the LED strip is wrapped.
- Krylon K07010 11-Ounce All-Purpose Spray Adhesive: I used this to stick all of the fluff together and to the polycarbonate tube. It’s impressively sticky once it dries a bit.
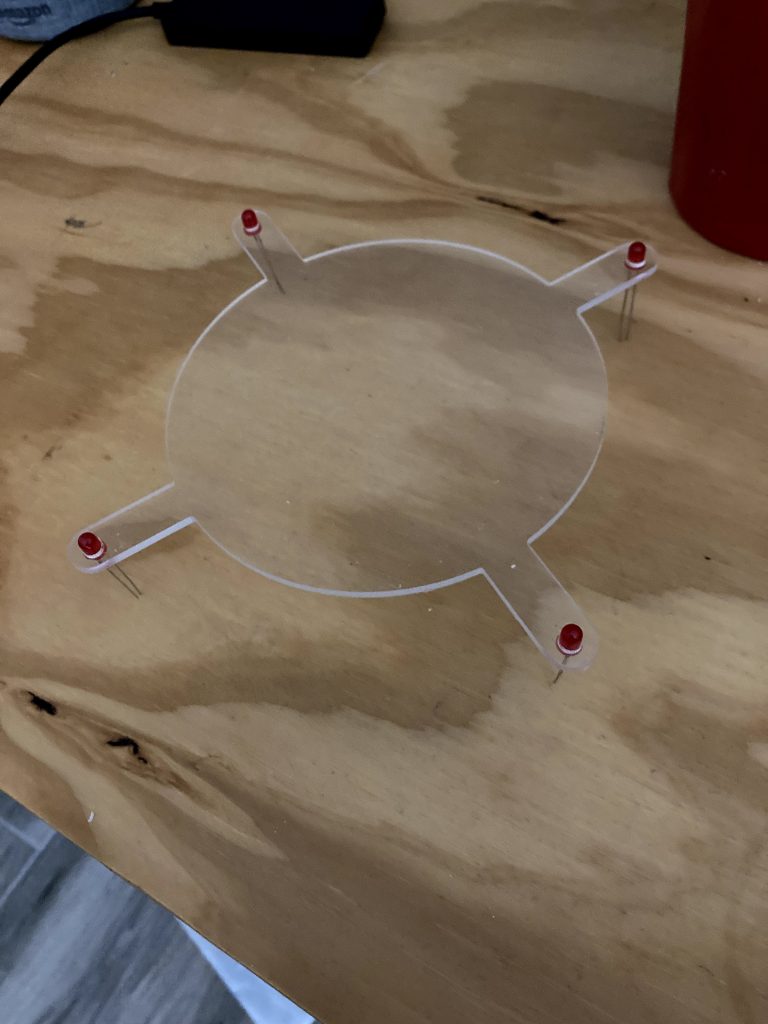
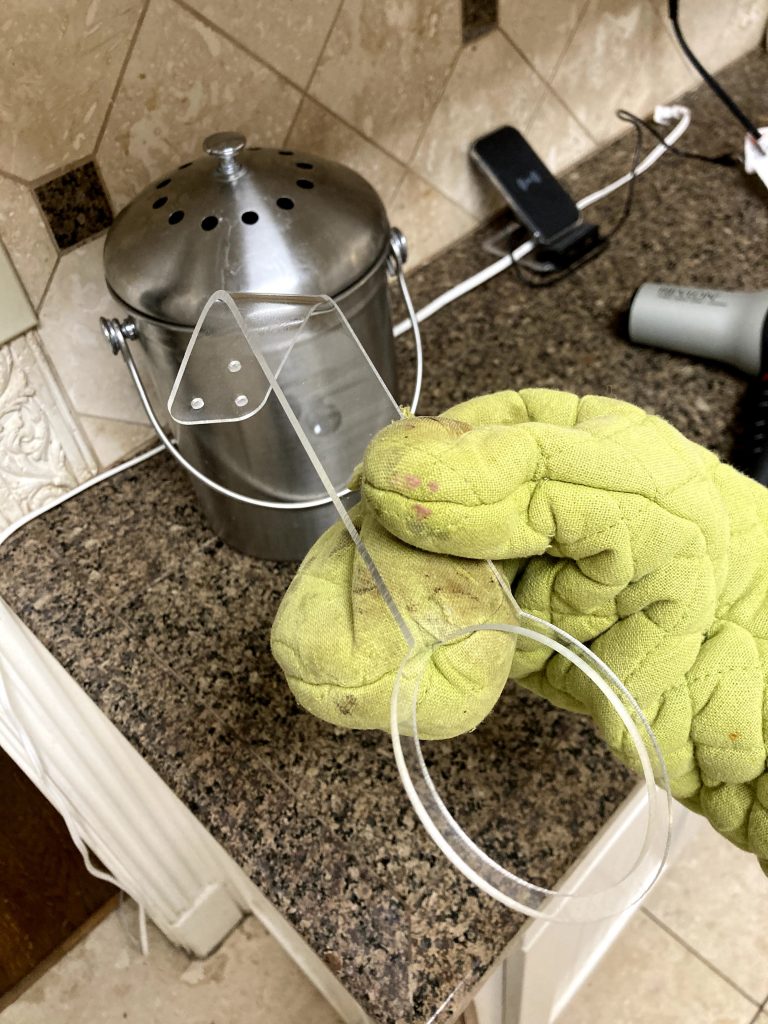
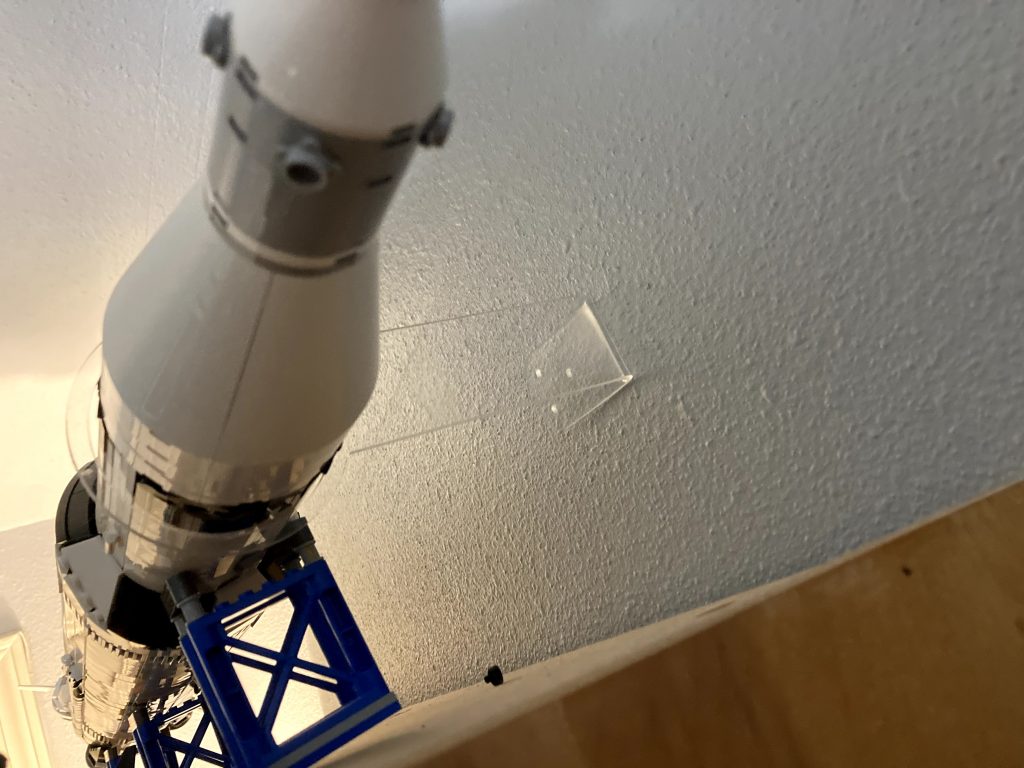
- Clear Cast Plexiglass, 3mm Thick: I used this with the CNC function of the Snapmaker to carve out the platform for the rocket to rest on and the support bracket for the upper portion of the LEGO rocket to avoid RUDs.
Milling the Platform and Support Bracket
I recently got a Snapmaker — a 3 in 1 unit that does 3D printing, laser cutting/engraving, and CNC milling. The 1.6w laser isn’t powerful enough to cut clear acrylic, but the CNC mill worked nicely to turn the plexiglass sheets into just the parts I needed. In addition, the acrylic becomes fairly malleable when sufficiently heated with a hair dryer, so I was able to shape the support bracket with the right angle I wanted. (If you want to make one, I’ve included the Fusion 360 model in the Github repository for the project.)

Creating the Audio
I combined several different sound files to create the final product, all of which were available as historical records: JFK’s speech, the Apollo 11 countdown, and the roar of the rocket. (Dirty secret: the rocket sound is actually from a Delta IV, not a Saturn V.) Audacity, as it often does, served well for this little chore.
The combined file is also in the GitHub repository, stored as an Ogg Vorbis file. Because the sound module only has 2MB of onboard memory, I had to be somewhat aggressive about compressing the sound down to get it to fit comfortably.
Once the sound was created, it was an easy matter to pop it over to the sound module, which simply mounts as a USB drive when you plug it directly into a computer. Again, the Adafruit module is super-flexibly and very handy for any projects where you may want to trigger playback of a library of sounds.
Creating the Flame Effect
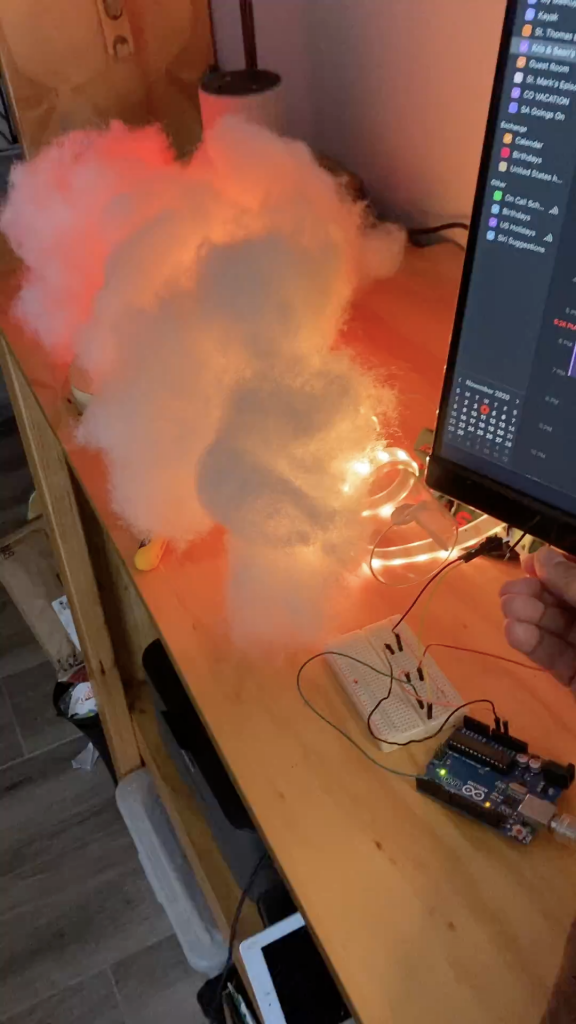
This part was great fun! Ase Miller was kindly posted the code that he had used for his Saturn V display, which I used as a starting point. I had gotten RGB LEDs, which were cheaper than the RGBW ones he used, so had to modify the code accordingly. I also wanted to be able to adjust the throttle up and down and have varying amounts of “fire” in the plume, and eventually plugged the LED strip in from the bottom instead of the top, so had to make adjustments for all of those things as well. But after a good deal of tweaking, I was able to get the modified code producing a lovely flicker effect while laid out on my workbench with wads of polyester fiber sitting on top.
Synchronizing the Audio and Visuals
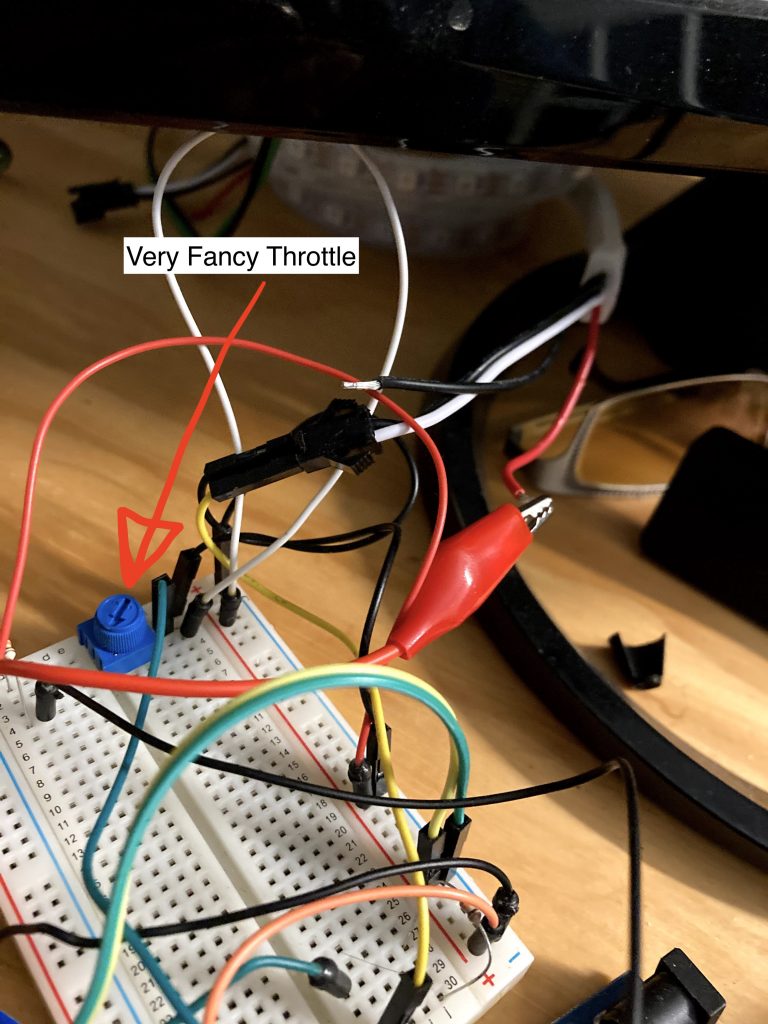
My first thought when I started to work on the problem of getting the audio and video working together was to do a performance capture: to give myself a rocket throttle, and to have the Arduino record what I was doing while I drove the throttle in sync with the recording. This worked fine for the capture: I figured about 5Hz sampling rate should be plenty, so did a couple of runthroughs until I was happy with one. The problem came, however, when I tried to put that performance back into the program for playback: it was simply too big for the Arduino Uno’s paltry memory.
So, Plan B: I looked through the performance capture data and found the places where I’d made a big change to the throttle, and simply coded those keyframes up. I then added some “tweening” logic to move smoothly from one value to the next. This worked a treat, and took considerably less memory than my first approach. Problem solved with only a little cursing!
Putting it All Together
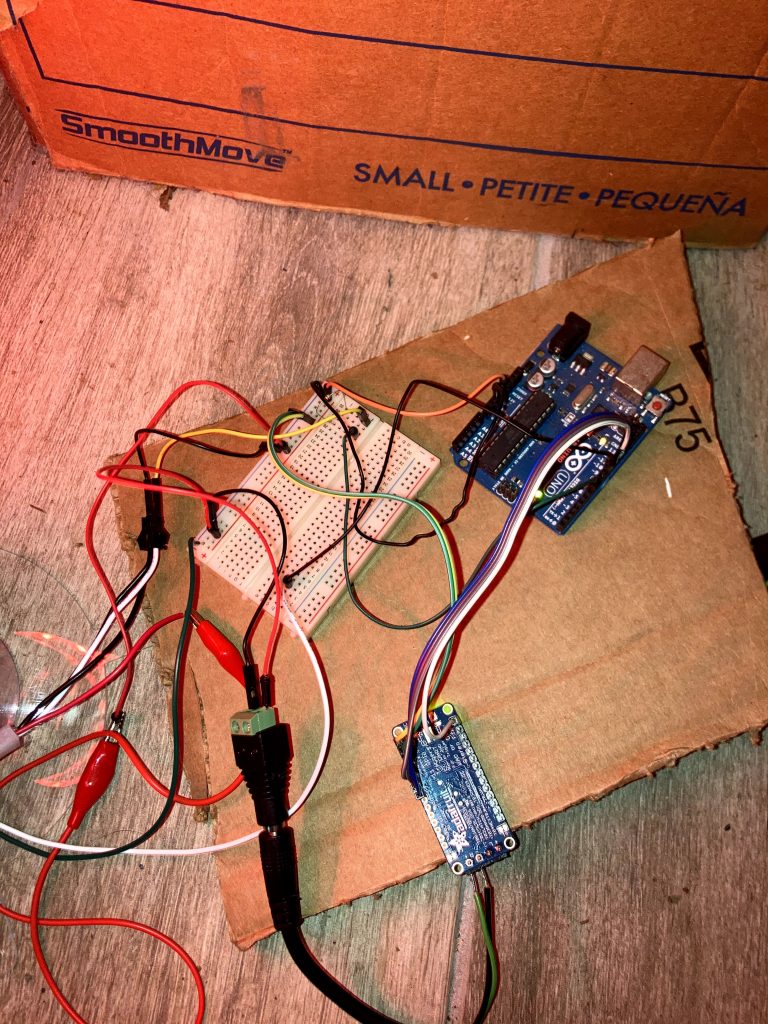
At this point, I had all of the components more-or-less sorted out, so started assembling them in the corner of my office. I drilled some holes in the main tube for the wires, removed the no-longer-useful throttle and its leads, connected and soldered bits and bobs, wired in the big power supply, and hot glued the platform to the tube and to the base.
Then I started applying the polyfill with the spray adhesive. Getting the first bits to stick to the column was a little bit tricky, and required bracing the column from the back while I held it together for a bit. After a few minutes, I got the hang of it and things started moving faster. I kept the lights on while I glued to make it easier to see the effect I was getting as I went.
And finally, the giant plume was in place. I measured and secured the bracket, stuck the top of the rocket in it, eased the bottom into place on the platform and — callooh callay! — it all worked.
Wrapping Up
As happy as I was with how this turned out, I had a few ideas for potential improvements: one of these to turn it on would be fun:
Adding more sophisticated Alexa and Homekit support would be nice. (The project is just connected to a smart plug at the moment.) And a big, powered subwoofer would make the rocket launch much more impressive. But for now, I’m delighted with what I’ve got, and have taken to starting my workday with an enthusiastic “Alexa, turn on Apollo 11!”
If you’re interested in the code I’ve used (it’s pretty messy), the models, or the audio file, you can find all of them on the Github repository for the project. And if you want to chat further about the project or commission something similar, please feel free to drop me a note at sean@mcmains.net. Cheers, and thanks for reading!