
While playing with The Happy Out at the San Antonio Highland Games recently, we were a bit vexed to be utterly drowned out during one of our lilting acapella tunes by the band at the next stage. The musical interlopers in question turned out to be Celtica, a group known not only for their Scandinavian-metal tinged Celtic rock, but also for their fire-belching bagpipes. While we have no aspirations to match them in volume, we were impressed with their visual flair, and decided to see what we could do to step up our own, ideally in ways that would not cause the fire marshal to raise a concerned eyebrow.
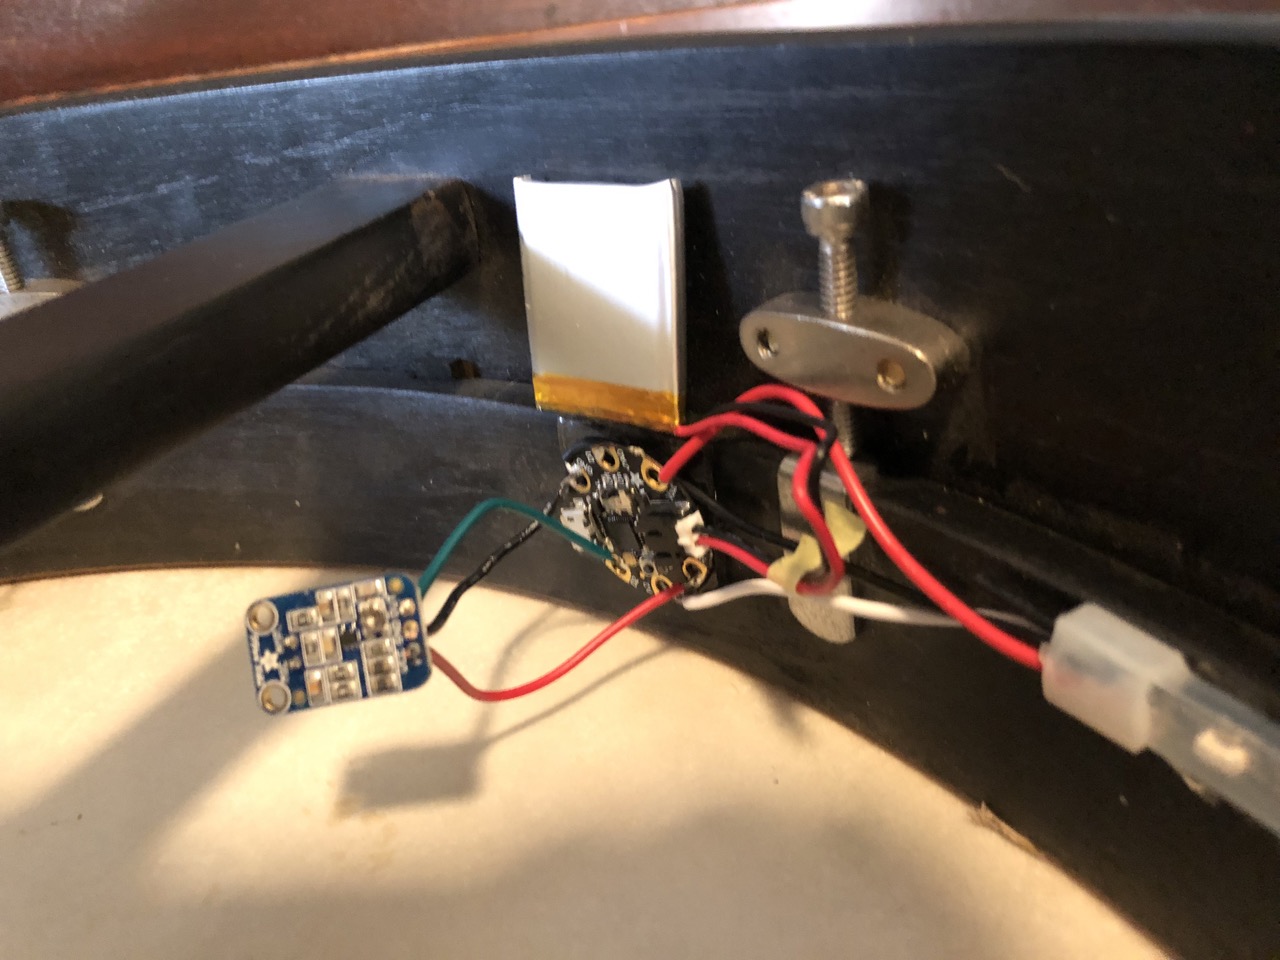
On my return home, I immediately launched into a couple hours of feverish research, followed by placing an order from Adafruit, one of my favorite electronics supply houses. A few days later, the shipment arrived, followed closely by some tinkering, prototyping, tea-drinking, assembly, thinking, coding, cursing, disassembly, soldering, and reassembly. Eventually, the smoke billowing from the chimney of my workshop abated and I emerged with v1.0 of The Nuclear Bodhran[^1]!
I was fortunate in this effort that Adafruit had published an article on their site on making the drums in a trap set sound-reactive. I used their parts list, circuit diagram, and code as a starting point for my efforts. However, I made several tweaks to their design that better suited it to my needs:
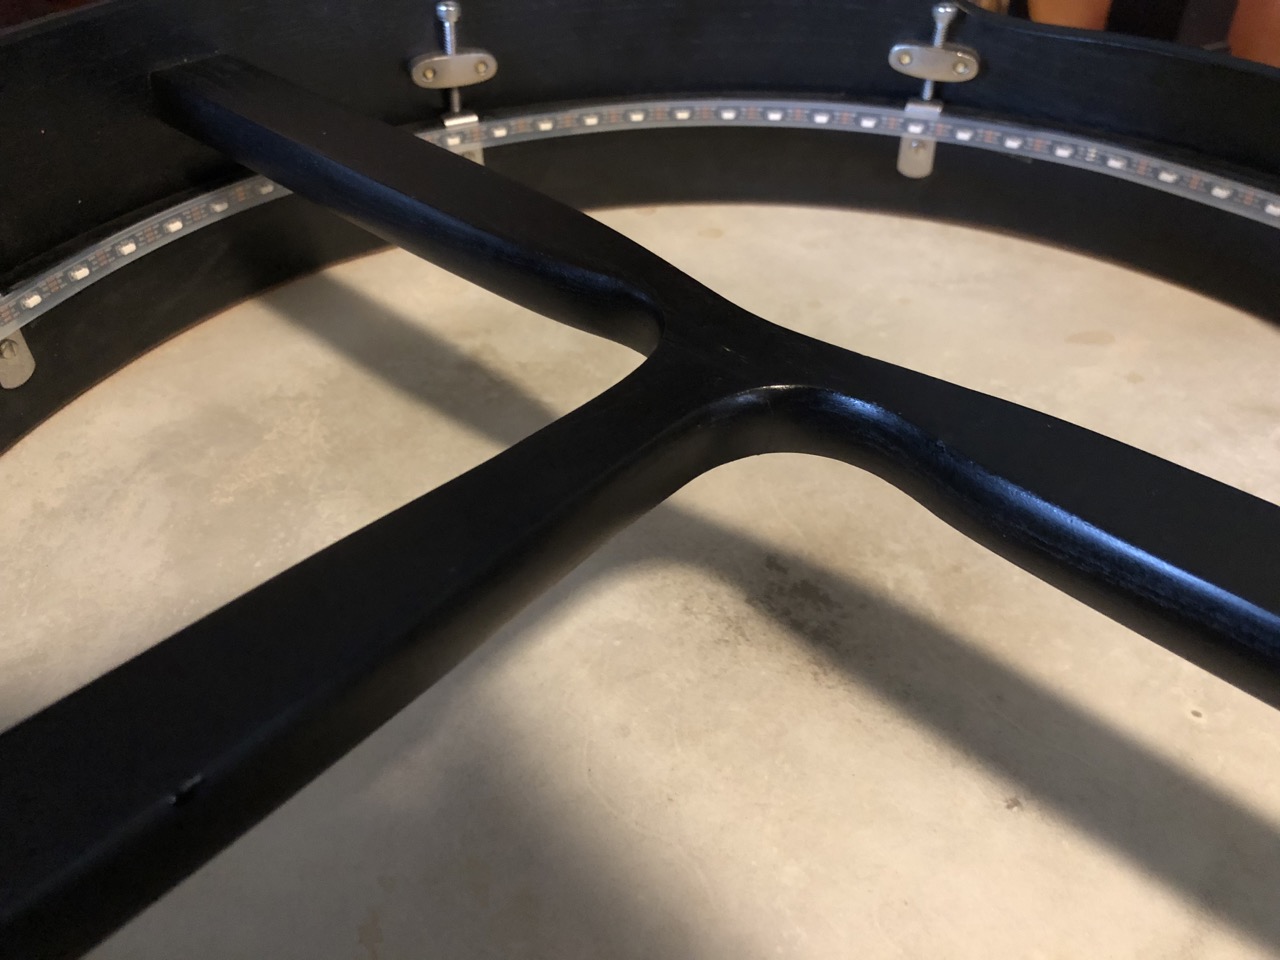
- I used a Neopixel strip that emits light to the side, rather than outwards, which allows the LEDs to light the drumhead nicely without obstructing the sound or getting in my way while playing.
- I added the ability to switch through several different display modes:
- All of the LEDs reactively light up green (standard Irish pub gig mode)
- All of the LEDs reactively light up in a rainbow pattern (pride parade gig mode)
- Irish Flag mode, where the drum is split into three regions that are illuminated in orange, green, and white
- I used a capacitative switch library to allow me to touch the microcontroller on one of the electrical contacts to change through the modes.
- I added code to use the built-in LED on the Gemma M0 to display a color to indicate the current mode.
- I omitted the power switch, as the Gemma M0 has one onboard.

Project Reflections
- I was really pleased with how quickly the lights are able to respond to the sound, tracking very accurately even the super-quick beats one gets when using both ends of the tipper to strike the drum head.
- The brightness is good — not enough to show well outside, but certainly sufficient for an indoor setting without huge stage lighting, and perfect for the dim corners to which we are most often relegated.
- This was my first battery-powered electronics project, and I was pleasantly surprised at how easy the Gemma controller makes it to do: the USB connection powers it when plugged into a computer for programming, and when I plug a LiPo battery into the appropriate terminal, it boots up and starts running the last code I’d loaded into it in less than a second.
I’m quite happy with how this first version turned out. For future versions, I might explore whether there are brighter light strips available, or whether using strips with more LEDs per meter would allow the lighting effects to be seen in a broader range of environments. I’ve also considered changing out the Gemma M0 for a microcontroller that supports wifi and bluetooth so that we could sync up lighting effects on multiple instruments or even have the audience send texts from their phones to change the lighting effects. (There is no end to my nerdiness.)
I’ll be trotting this out for the first time at The Cottage this weekend; looking forward to seeing how it’s received!
Resources to Build Your Own
- The original project at Adafruit: https://learn.adafruit.com/gemma-powered-neopixel-led-sound-reactive-drums/overview
- My code: https://gist.github.com/SeanMcTex/3aa83ca059b0f9b98bd299960e1cc5df
[^1]: Not actually nuclear. But actually a bodhran.